Showing posts with label recipe. Show all posts
Showing posts with label recipe. Show all posts
Homemade Pancake Syrup
Super Easy Chocolate Cupcakes

There has not been a new recipe in my recipe tab for a while now and that is because I really have become lazy when it comes to doing kitchen work. I blame this on my evening classes and the need to get homework done. Hopefully, I don't go as crazy this coming semester. I made these cupcakes before almost going giftless to our friend's birthday a couple of weeks ago, I decided to stay at home, skip the mall and opt for a more personal gift that I know only I would [probably] make...cupcakes! <3
Best Ever Turkey Meatballs
If you're in the mood to cook something new, you've come to the right place. I have been out of my own cooking mood for a LONG time and after hearing my coworkers talk about slow cooking meatballs, I HAD to try it that same night. So here goes.

If you have ground turkey meat but no meatballs, click here (allrecipes.com) for the insanely easy recipe I use. If you do have frozen meatballs, you can use that one.
When you have the meatballs ready for cooking, I have your next steps below. I found this recipe while doing my Google search and loved the idea of it. Ron and I love both honey and garlic and I could not see how this could go wrong. I added more garlic though because we LOVE garlic. :)
Honey Garlic Slow-Cooked Meatballs
You will need:
Directions:

If you have ground turkey meat but no meatballs, click here (allrecipes.com) for the insanely easy recipe I use. If you do have frozen meatballs, you can use that one.
When you have the meatballs ready for cooking, I have your next steps below. I found this recipe while doing my Google search and loved the idea of it. Ron and I love both honey and garlic and I could not see how this could go wrong. I added more garlic though because we LOVE garlic. :)
Honey Garlic Slow-Cooked Meatballs
You will need:
- ¼ cup brown sugar
- ⅓ cup honey
- ½ cup ketchup
- 2 TB soy sauce
- 6 cloves garlic, minced
- meatballs
Directions:
- In a medium bowl, mix together brown sugar, honey, ketchup, soy sauce and garlic.
- Place frozen meatballs in a 3-4 quart crockpot and pour sauce over meatballs. Stir so all meatballs are coated evenly. Cook on LOW for 4 hours, stirring occasionally.
- Use as an appetizer or serve over rice for a meal!
Banana Loaf with Cashews

Just a few weeks ago, Ron's dad got us a tub of (extra fancy) unsalted cashews from Costco and after seeing the super old and sad bananas in the fridge that I have been saving for a day when I would feel like baking, I felt responsible about not letting the bananas go to waste. So here I am now.
Drenching the cashews with the batter was my favorite part. Just look at this beautiful confusion-filled chaos.

My search for the recipe was not at all far and wide, it was one of the first recipes on Google. I was a little surprised but maybe it's because people usually use walnuts in their banana bread? This recipe is fairly easy and delicious. Ron wanted it to be just a tad bit sweeter but I think it's a perfect match to a sweet cup of coffee or tea with sweet creamer. :) Keep scrolling, I promise you, you're almost at the recipe!


Ingredients:
- 1/2 cup butter (or margarine)
- 1 1/3 cups sugar
- 3 eggs
- 1/2 teaspoon vanilla
- 1 cup mashed banana (I used 3)
- 2 cups flour
- 2 teaspoons baking powder
- 1/4 teaspoon baking soda
- 1/4 teaspoon salt
- 1/2 cup chopped cashews
- Preheat oven to 350. Prepare a 9x5 loaf pan by buttering and flouting it.
- Sift together flour, baking powder and soda, and salt. Set aside.
- In a medium bowl, cream butter and sugar together. Add eggs, one at a time, continuing to beat followed by the vanilla and mashed bananas. Gradually mix in the dry mixture, Be careful not to overmix -- stop mixing when ingredients appear to be well-incorporated.
- Fold in chopped cashews.
- Pour batter into the pan. Bake for one hour or until tests clean with a toothpick.


How to Chop Nuts
While I was baking the other day, I did not know what do with the whole cashews that I needed chopped for the recipe** I was following. Then a little light bulb lit up so I immediately grabbed a sandwich bag, the cashews and my favorite knife. This is such a basic and simple kitchen trick that I think we will all find useful once in a while. :)
**Recipe to follow! :)

**Recipe to follow! :)
Moist One-Bowl Chocolate Cake
As I was putting away dishes from the dishwasher one night, I noticed that I had so many Hershey's unsweetened cocoa in my baking cupboard. Upon seeing them, I knew I had to do something about it, and decided to bake a cake. I was also craving for chocolate all day that day so it was perfect timing!
I began researching for recipes and found this gem on AllRecipes.com. So here goes...

Before anything else, put water in your kettle and start the water boiling process and preheat the oven. Next is mix the dry ingredients until all the ingredients are well distributed, then mix in all the wet ingredients EXCEPT for the water.
I did not put a lot of water in my kettle so when I was done mixing the ingredients, the kettle started to whistle. Talk about perfect timing. ;) Pour the water in the batter and mix on low for 1 minute.
At this point, the batter will be runny and watery. Don't worry, it means you're doing it right. ;) Pour the batter onto prepared 9x13 pan.


Ingredients
Directions
And there you have it, a super easy chocolate cake recipe!

I began researching for recipes and found this gem on AllRecipes.com. So here goes...
Before anything else, put water in your kettle and start the water boiling process and preheat the oven. Next is mix the dry ingredients until all the ingredients are well distributed, then mix in all the wet ingredients EXCEPT for the water.
 |
 |
I did not put a lot of water in my kettle so when I was done mixing the ingredients, the kettle started to whistle. Talk about perfect timing. ;) Pour the water in the batter and mix on low for 1 minute.
 |
 |
 |
 |
Ingredients
- 2 cups white sugar
- 1 3/4 cups all-purpose flour
- 3/4 to 1 cup unsweetened cocoa powder
- 1 1/2 teaspoons baking powder
- 1 1/2 teaspoons baking soda
- 1 teaspoon salt
- 2 eggs
- 1 cup milk
- 1/2 cup vegetable oil
- 2 teaspoons vanilla extract
- 1 cup boiling water
Directions
- Preheat the oven at 350 degress, start boiling the water and prepare the 9x13 pan.
- Put all the dry ingredients in the bowl and mix until eveything is evenly distributed.
- Mix in the eggs, vegetable oil, milk and vanilla extract and keep mixing until all the ingredients are well incorporated.
- Pour the boiling water into the mixture and mix on low for a minute.
- Transfer the batter into the prepared 9x13 cake pan and bake for 35 minuntes or when the toothpick comes out clean.
- When the cake is ready, take it out of the oven and let it sit in the pan for another 10 minutes, then transfer it onto the cooling rack.
And there you have it, a super easy chocolate cake recipe!
The Morning I Made Ebeskivers
I love making Christmas breakfast. However, last year, it was just Ron, my mom and I, so we did not have a breakfast feast. My mom and I also slept in so yeah, the big breakfast did not happen. We planned it though, that's why I bought this pan a week before Christmas but ended up not using until one summer morning when I woke up with no hangover (I say that because it was the morning after hanging out with my cousins). That was the morning when I made Ebeskivers.

Eberlskivers are traditional Danish pancakes which unlike our regular pancakes, are the in a spherical shape. They are as yummy but you can eat it with your hands! ;)
We also had mangoes at home, so to incorporate something that Ron loves (because he's not a huge fan of pancakes), I sliced one up and prepared it.
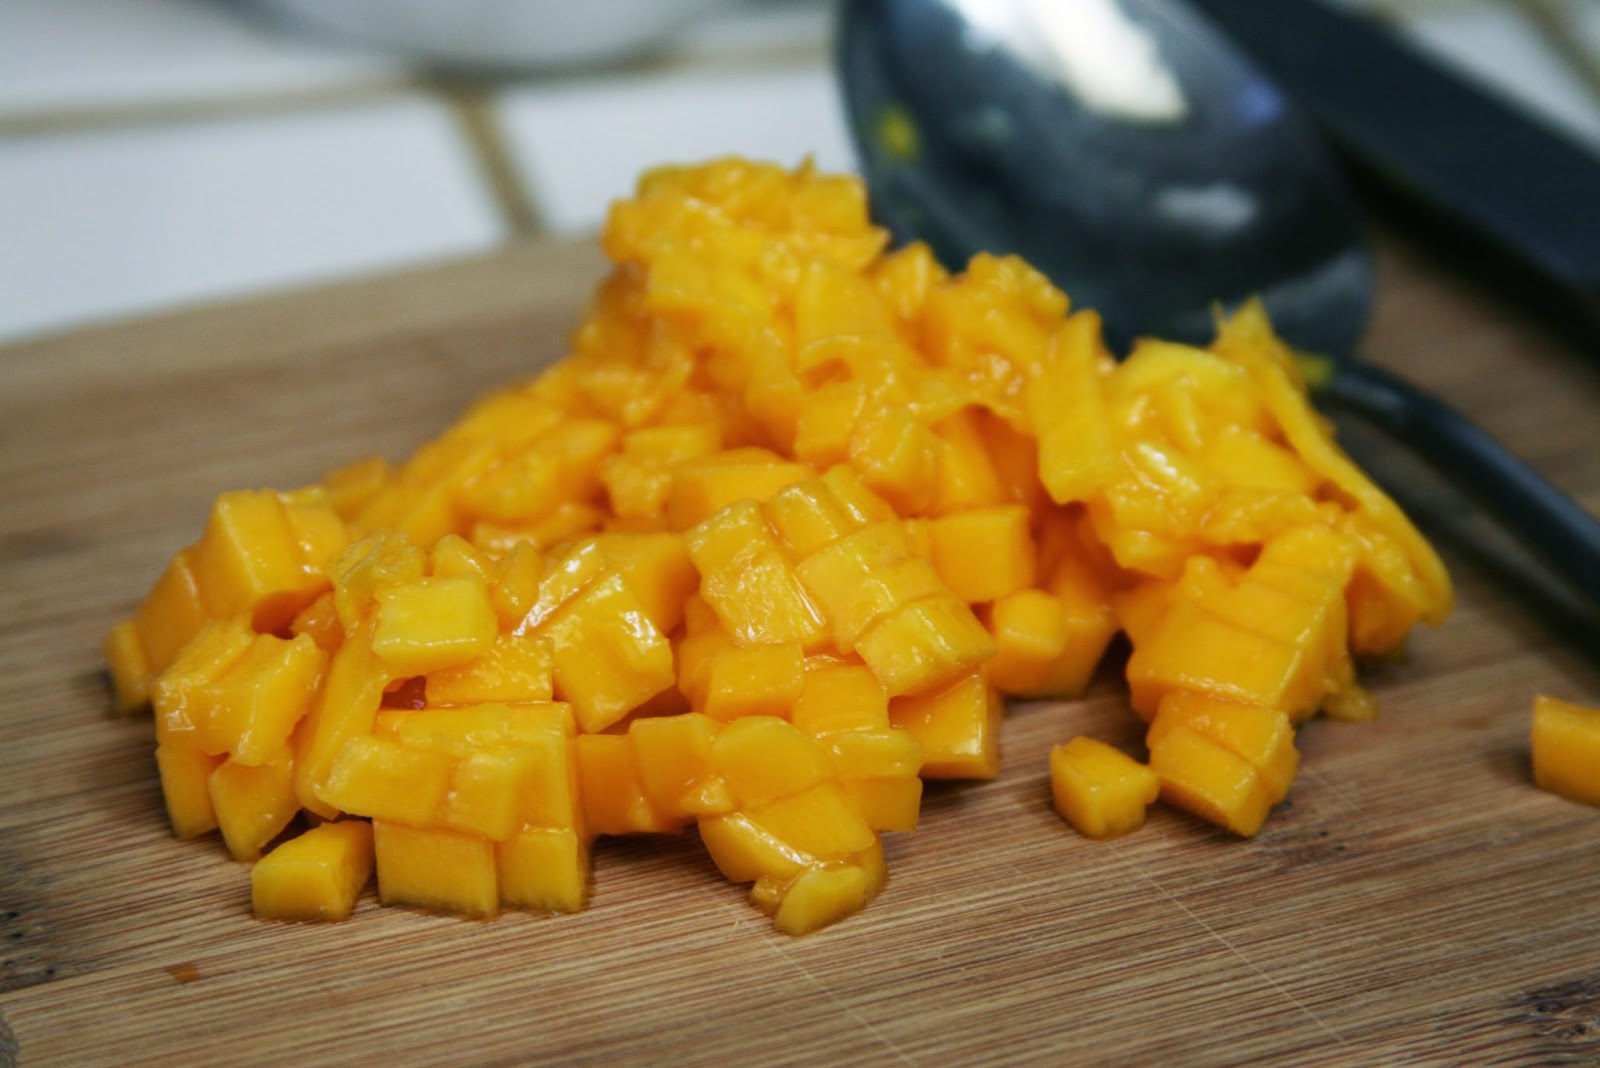 For this recipe, I used Krusteaz Light and Fluffy (our favorite kind) because I was not in the mood to measure and mix pancakes from scratch. LOL! I prepared the pan by buttering it, poured a tablespoon of batter and plopped a tablespoon of sliced mangoes.


 When the bottom is cooked and starts looking like it has a thing crispy crust, turn it over and wait until the color evens out. :)


If you'd like to try this but you need a pan, here are a few options where you can buy one:


Eberlskivers are traditional Danish pancakes which unlike our regular pancakes, are the in a spherical shape. They are as yummy but you can eat it with your hands! ;)
We also had mangoes at home, so to incorporate something that Ron loves (because he's not a huge fan of pancakes), I sliced one up and prepared it.
If you'd like to try this but you need a pan, here are a few options where you can buy one:
Lengua de Gato
Last week, my cookie press (along with a ton more baking paraphernalia) from my super awesome auntie was delivered by my sister to our house, so I HAD to bake something on Sunday night...instead of doing the laundry like I planned because baking. ;) Off I was to the interwebs to look for a recipe I can base of my recipe off of, when I found one, I pulled my KitchenAid mixer from its spot and began to mix away.

Lengua de Gato is a popular cookie in the Philippines. Upon doing a little research for this post, I learned that it is not only made in my home country, it also has various versions and names; "langue de chat" (French), "Lingua di gatto" (Italian) and "Língua de gato" (Portuguese).

The real lengua de gato looks much better than what I was able to do but for my first time using the cookie press, I think they're good enough because Ron loved them. Also, mine was airier and a little on the breadier side. I suggested that he dip it into our Mango Jam (which he hates) or whatever spread we have at home. He didn't want to because he said the sweet after taste was good enough for him. After a few more (like five) tastings, we decided that it tastes like a hybrid between lengua de gato and Madeleines but I'm sticking with the former because they look more similar and the crunchy part around the cookie/pastry tastes more like lengua de gato.


Ingredients:
Directions:
Lengua de Gato is a popular cookie in the Philippines. Upon doing a little research for this post, I learned that it is not only made in my home country, it also has various versions and names; "langue de chat" (French), "Lingua di gatto" (Italian) and "Língua de gato" (Portuguese).
The real lengua de gato looks much better than what I was able to do but for my first time using the cookie press, I think they're good enough because Ron loved them. Also, mine was airier and a little on the breadier side. I suggested that he dip it into our Mango Jam (which he hates) or whatever spread we have at home. He didn't want to because he said the sweet after taste was good enough for him. After a few more (like five) tastings, we decided that it tastes like a hybrid between lengua de gato and Madeleines but I'm sticking with the former because they look more similar and the crunchy part around the cookie/pastry tastes more like lengua de gato.
Ingredients:
- 9 tablespoons butter, softened
- 3/4 cup white sugar
- 2 tablespoons white sugar
- 3 egg whites
- 1 1/2 teaspoons vanilla extract
- 1 1/2 cups all-purpose flour
Directions:
- Preheat the oven to 400 degrees F (200 degrees C). Line cookie sheet with parchment paper.
- In a medium bowl, cream together butter and sugar until smooth. Beat in the egg whites one at a time until batter is light and fluffy. Stir in the vanilla. Mix in the flour just until blended.
- Using a cookie press or a pastry bag with a medium star tip, press dough onto prepared baking sheet into 3-inch lengths. I used two pumps while pulling the cookie press.
- Bake cookies in preheated oven until it has a light brown shade, about 7-9 minutes. Cool on wire rack.
- When cookies are cool, dip in your favorite sweet dip and enjoy! For "extra" cookies , store in a cool place.
Super Easy Tomato, Basil and Parmesan Pasta

There is actually a good backstory on why I made this: Epi and I cooked too much pasta for their (super duper good) Clam Pasta. Yeah, that's a really good story, isn't it? LOL
Anyway, aside from the pasta, we also have leftover basil leaves that I did not really want to go to waste because basil smells so fresh and it mixes well with almost everything! Before anything else though, if you'd like to skip the pictures, the complete recipe is at the bottom of this post.
This is probably the easiest recipe I will share on my blog. It only requires a few ingredients that almost every household has. Let's start with the "sauce," below are the three of the four ingredients you need to prepare. The fourth one is the pasta, if you don't have cooked pasta yet, cook 8 ounces of pasta according to the package instructions. If you have cooked pasta, measure 20 ounces or four cups for this recipe. For your future reference, 2oz uncooked pasta is 5oz cooked pasta. Also, every 2 oz uncooked pasta is a cup of cooked pasta. I know that from my own research. ;)

Next step is to heat a table tablespoon of EVOO and mix in the basil leaves, minced garlic and the tomatoes. Add salt and pepper to taste.

Once well incorporated, toss in the pasta. You can use any pasta by the way. :)

If you're serving the whole thing at the table, you can garnish it with 3/4-1 cup (or as much as you want) grated parmesan cheese. But if you're eating it one plate at a time because your husband does not enjoy pasta dishes as much as you (Hahaha), garnish your plate with as much parmesan cheese as your heart desires.


Ingredients:
- 20 oz cooked pasta or 8oz uncooked pasta (but please make sure to start cooking this before you start preparing the ingredients)
- 3 tomatoes, chopped
- 4 cloves of garlic, minced
- 1/3 cup fresh basil leaves, sliced
- 1 tablespoon extra virgin olive oil
- paremsan cheese
- salt
- pepper
- Prepare pasta if needed.
- Heat the EVOO, mix in the tomatoes, garlic and basil leaves.
- Toss in the pasta and make sure the herbs are evenly distributed.
- Garnish with parmesan cheese and enjoy!

Peanut Butter Banana Carrot Pupcakes

Because I did not want to make a whole cake for Fox's birthday last month, I decided to make little servings that we can give out to the other dogs at the dog park...which did not happen because there were too few dogs and the owners were sitting at the other end of the park from us. LOL Nevertheless, Fox and his cousin Tashi gobbled them up. Tashi even ate Fox's muffin's last bite. Haha!
I started with putting together all the wet ingredients mixing them until they are well incorporated.


Ingredients:
- 1 egg
- 1/4 cup peanut butter
- 1/2 cup unsweetened apple sauce
- 1 mashed banana
- 1 teaspoon vanilla extract
- 1/3 cup honey (optional)
- 1/2 cup shredded carrots
- 1 cup whole wheat flour
- 1 teaspoon baking soda
Directions:
- Preheat oven to 350 degrees F (175 degrees C). Prepare muffin pans by lining them.
- Combine the egg, peanut butter, apple sauce, mashed banana, vanilla, and honey, if desired, in a large bowl; blend well. I wanted to add plain non-fat yogurt but we don't have any on hand. It could have made the muffin a lot more moist.
- Stir in the carrots and mix thoroughly. Sift together the flour and baking soda and fold into the carrot mixture. Scoop batter into muffin pans. I used my normal cookie scoop for this.
- Bake in preheated oven for 8 minutes for the mini muffins and 15 minutes for the bigger muffins. Turn out onto a wire rack immediately to cool completely.
Note: Now Fox's muffins did not come out moist like the reviews from the original recipe I got this from because I did not use oil. It just felt wrong to put oil into something that my dog would eat. However, if you're okay with giving your dog oil, you can do that as well.
And as promised, here is Fox's taste test video: